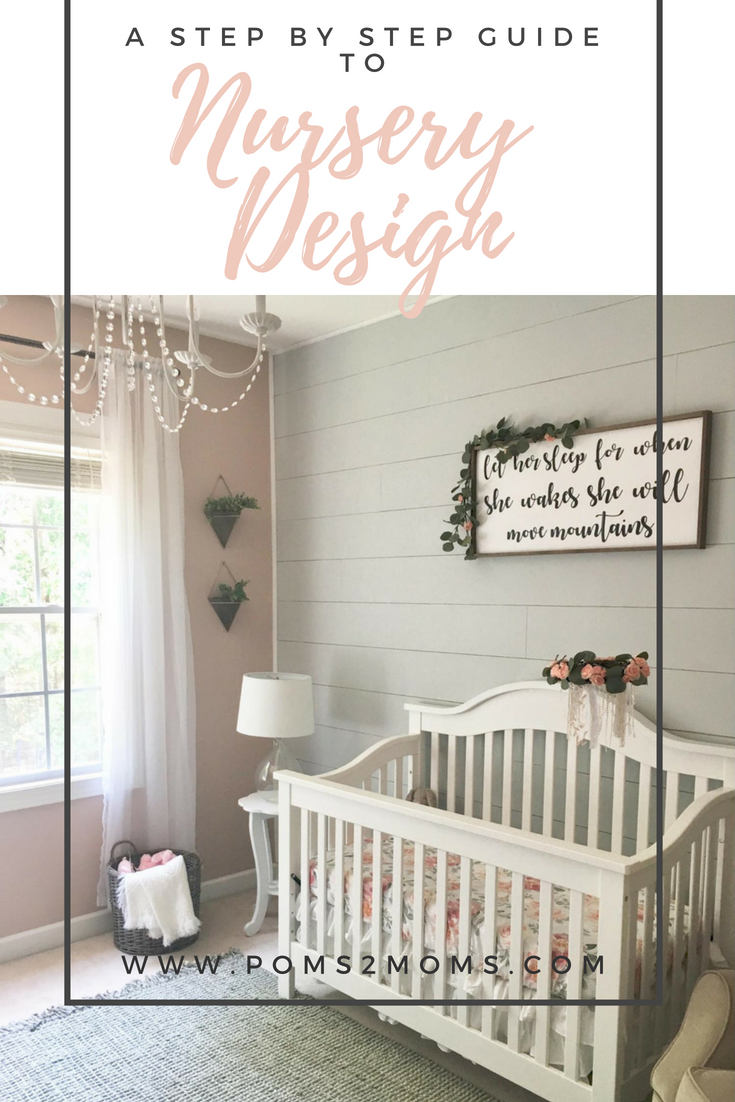
From Big To Small: Baby Girl Nursery Design Staples You Need Immediately
One of the most exciting things about welcoming a new baby, (outside of adding a precious member to your family!) is designing the nursery. When you see the finished product, the room that your sweet newborn will call his/her own, it makes their arrival so much more real!
[ReviewDisclaimer]
Nursery design can be tough – I mean, have you seen all of the cute stuff out there these days? But I think there’s a simple formula to designing a beautiful room for your little one. START BIG. Finish small.
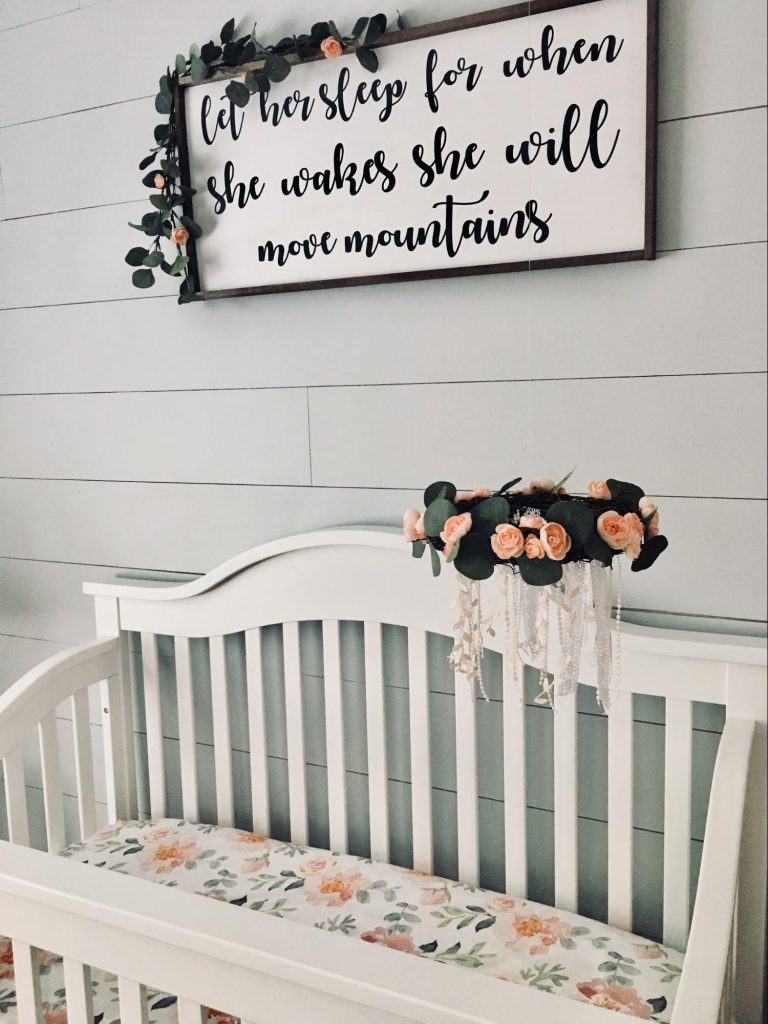
Starting REALLY BIG PICTURE, when thinking of our new baby’s nursery design, I knew I wanted to have a shiplap wall (using this tutorial, super easy!), regardless if we were having a boy or girl. I also knew I wanted to paint it gray because I thought it would be a nice contrast against the white crib.
*I get asked quite a bit what color the gray shiplap wall is; it’s Sherwin Williams Mindful Gray!*
As soon as we found out we were having a girl, we went to Lowe’s to pick out a paint color. I choose my traditional complementing grays and whites while my sweet Aubrey picked out an array of bright colors. She even picked out this soft pink color that she said is “the best pink ever!”
I did not want pink walls at all, but she insisted that I get a sample of it for her. To avoid a meltdown over a $3.95 sample, I purchased it. When we got home, we decided to give it a try. The second we painted a pink heart on the wall, I knew this was the perfect color for our nursery. With that little pink heart, the theme of soft blush pink, gray, and white was born!
Once the theme was decided, the shiplap was finished, and the walls were painted, I stepped back and started my thought process and putting my nursery design plan in place. Any time I am designing anything, I have to start big and work down to the smaller design elements.
Here’s how I do it.
Lay out your space first. I have 4 Big Items that have to establish their position in the room before I can start to add in all of the little touches that take if from a bedroom to a sweet nursery. (Don’t forget to check out Kaitlin’s piece on nursery essentials for further inspiration!)
The 4 Key Pieces Are:
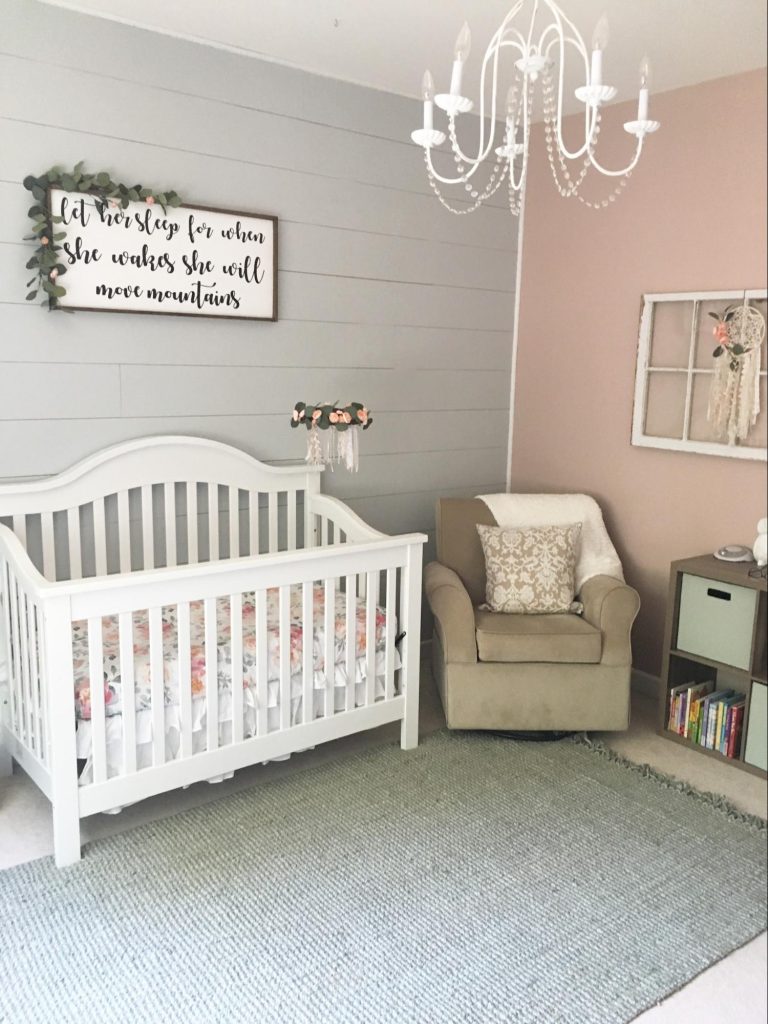
1.) Crib – Our crib is the same one we had for Aubrey. I went with a very classic look that I knew would be able to work for multiple kids and would stay in style for numerous years. A crib can be an investment so I suggest getting a convertible crib that will grow with your baby.
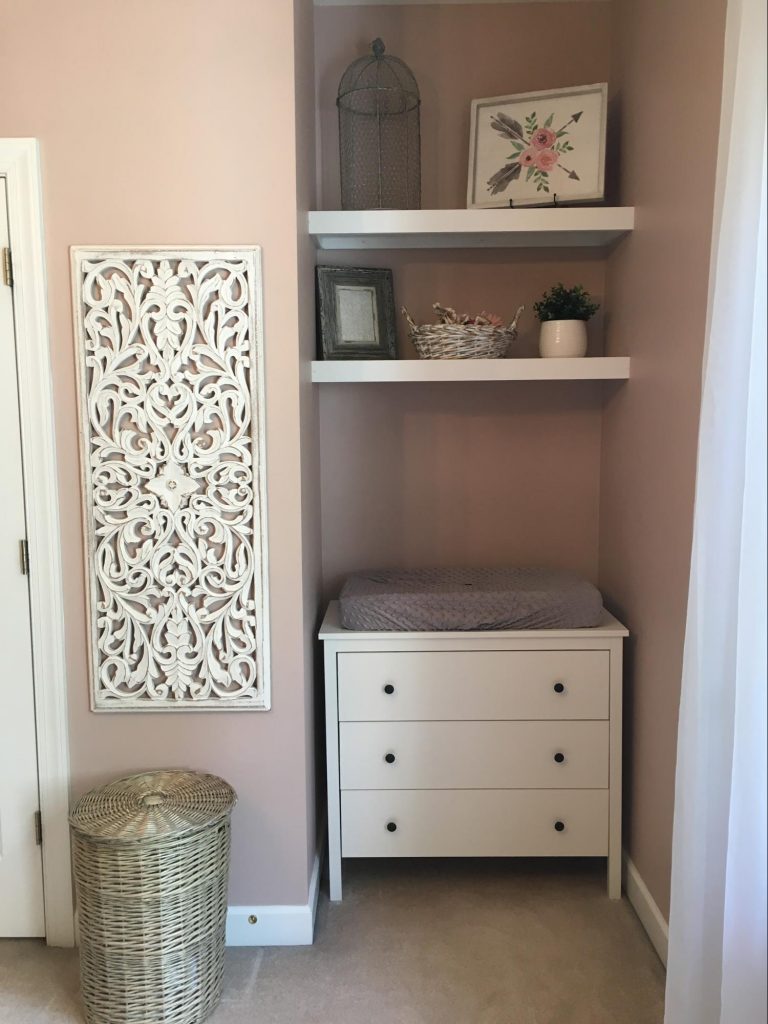
2.) Changing Table – This does not have to be a designated “changing table.” I love the look of just setting a changing pad on a dresser or chest of drawers. This is a smart move because once your child grows out of it, you don’t have to purchase more furniture, rework your layout, or spend more money.
3.) Rocker – In most cases, a glider or rocker is the most challenging piece to make work in a room. I moved ours around at least 5 times before I found the right fit. It’s important to find a place where the rocker doesn’t look too cramped and has enough room to rock back and forth without putting a hole in the wall.

4.) Chandelier – This is one of my most favorite things to shop for! The chandelier, to me, takes the room to another level and adds so much personality and style! I am obsessed with the one I found for Caroline’s room because it is super feminine but also has that rustic farmhouse style that I love!
Once these pieces found their permanent home, I start building on my vision and letting things fall into place. Next, add the other elements that help you create a perfect space. Design around those big key pieces to create a dreamy space for your little one.
6 Perfect Design Details:
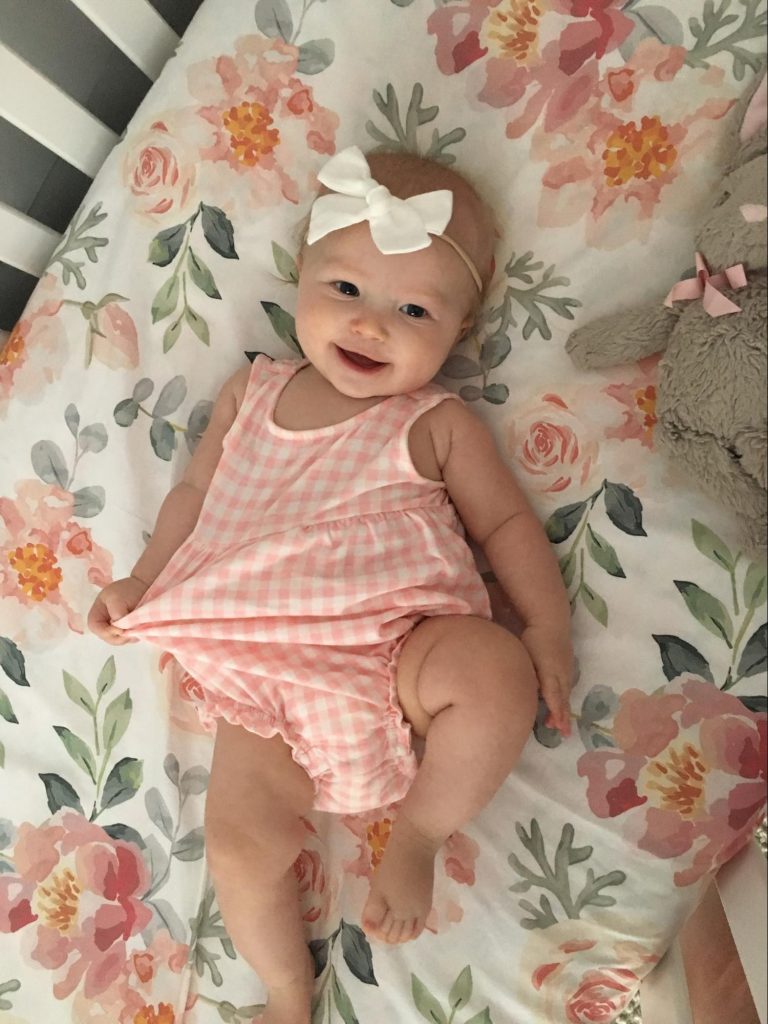
1.) Crib Sheet – So this is where I got the inspiration for my entire look. There is so much personality in a crib sheet whether is it a fun bold pattern, a solid color, or a classic soft floral. I splurged on mine from Caden Lane (shhhh dont tell Drew) and I’m so glad I did. I am obsessed with the pattern and colors because it matched the vision I had in my mind.
2.) Lamp – This may not be as important to some people but I love having a lamp in the nursery. When we start our bedtime routine I like to have the overhead light off and the lamp on so that it is a softer light and is one of my signals for bedtime.
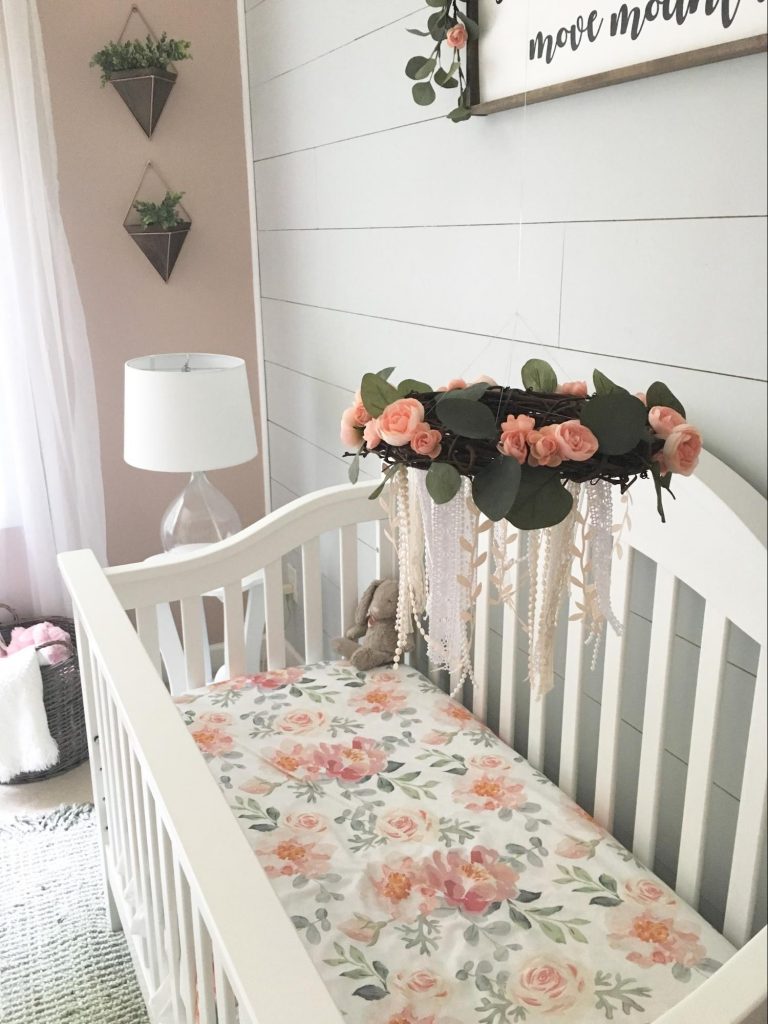
3.) Mobile – A mobile is not a necessity but they are so fun and cute and something that would only be used in a nursery. I searched everywhere for the perfect piece of art to dangle above my sweet baby but could not bring myself to spend $50 on it. So I decided to create my own; you’ll be so surprised how inexpensive and easy it was to create.
4.) Focal artwork above crib – Aubrey’s room was the traditional monogram, so I had to do something different for Caroline. My friend created this sign for me and I could not love it more! It ties in with my rustic look but by adding the same floral pieces from the mobile to the sign, it softens it up!
5.) Rug – I had no idea I needed one until I visited Kaitlin and saw the one in Maddie’s room! With a crib not taking up as much space as a bed, the rug really brings the entire space together and doesn’t leave so much open area. The rug also allows you to add additional colors and textures to your space.
6.) Fun little details to bring the entire look together! Look for special ways to add to your nursery design. For example, I knew I had to use this old window pane from Drew’s Grandma’s house. I found a dream catcher for $5.99 and added a little bit of the leftover floral from the mobile and sign to tie the entire look together.

If you love the space as much as I do, I’ve included the links to everything I bought. I love that I was able to create a nursery that does not look “babyish” but is a space that my sweet Caroline will be able to grow up with! It looks like she really loves it, doesn’t it?
What are some of your nursery design must-haves that help pull your vision together?

About The Author
Jenny
Founder & author of the parenting & lifestyle blog, Poms2Moms, but my full-time job is wine. Find me writing about my two precious girls, aspirations to become friends with Joanna Gaines, and balancing home-life with my career. Cheers! – Jenny
Whitley | 22nd Jun 18
I LOVE this nursery! It’s beautiful! Great tips!!
Jenny | 22nd Jun 18
Thank you so much! I really love how it turned out!
Jana Goodlife | 22nd Jun 18
That is such a cute nursery! I started almost like you. I made a pinterest board and started with design elements I really liked. I wanted it to be modern, white and clean. So we picked the artwork and crib first, built the dresser and added some decoration as we went. I love the crib sheets you picked and the wall colors. I think the pink worked really well with the grey.
Jenny | 26th Jun 18
I love your thought process! You build your dresser! I am super impressed. Please share a picture of your nursery, I would love to see it!
Terumi | 22nd Jun 18
I love how you added flowers to the dream catcher-that’s beautiful!
Jenny | 23rd Jun 18
Thank you, it was so easy!
Aliya T | 22nd Jun 18
This is the cutest little nursery omg. I absolutely loved designing my daughter nursery, Great tips.
Jenny | 23rd Jun 18
Isn’t it so much fun! Please share pictures of your daughters nursery! I would love to see it.
Amy @ Orison Orchards | 22nd Jun 18
I love the Start Big Finish Small mantra. Your daughter and her nursery are adorable!
Jenny | 23rd Jun 18
Aw, thank you so much!
Chells | 23rd Jun 18
Your nursery is absolutely adorable! One of my favorite parts of becomiGn a mama was definitely designing the nursery.
Jenny | 23rd Jun 18
Thank you! And me too, it is so much fun to put together and to know you are creating a space for your tiny newborn to go in is so special!
Katie | 23rd Jun 18
What a beautiful nursery!! It gave me some good ideas. I especially love the diaper changing/dresser nook!
Jenny | 23rd Jun 18
That is great! The diaper changing nook is one of favorite little spaces!
Hillary | 23rd Jun 18
This looks gorgeous! You did an awesome job.
Jenny | 26th Jun 18
Thank you so much Hillary! Thank you for reading my article!
Kristin's Peppermints and Cherries | 23rd Jun 18
Your nursery is absolutely gorgeous and so welcoming! I love the shiplap wall… and that chandelier!!! We have pink and grey in my daughter’s room, but the tones are slightly different. The colors are so complementary! Pinning!
Jenny | 26th Jun 18
The chandelier is my most favorite thing in the room! Pink and grey are such great complimenting color, I would love to see you daughters room!
Megan Rowsey | 23rd Jun 18
What a gorgeous nursery! I have boys so I didn’t get to do anything this pretty…not that I would have been able to match your level even if I did! Well done, mama!
Jenny | 26th Jun 18
I had a full plan for what I would have wanted for a boy nursery, but when we found out it was a girl I had to start from scratch. I am sure your little boys rooms look perfect!
Kelley | 25th Jun 18
Beautiful decor and tips!
Jenny | 26th Jun 18
Thank you so much Kelley!
Caroline | 25th Jun 18
What a charming nursery Jenny! I just love all your design choices beginning with the shiplap. Just beautiful!
Jenny | 26th Jun 18
I am obsessed with shiplap! My husband and I both were very pleased with how easy it was to put up and the final look!
Katie | 26th Jun 18
Hi where did you get the little planters on the wall!
Jenny | 30th Jun 18
Hey Katie! Those are from Hobby Lobby, $5 each!!