The Perfect Playroom Tent Hack… UPDATE!
Hey there, mommas! If you have been following us for a while, then it’s possible you have read about the cutest, easiest, and best of all, do-it-yourself playroom tent that I set up in my girls’ playroom a few months back. It’s our MOST visited blog post and is sitting at over 35,000 Pinterest saves! That’s why I’m SUPER excited to share an update on it with you today; a cushiony addition to the PERFECT playroom tent hack!
[ReviewDisclaimer]
If you are new to Poms2moms, welcome to our squad! We are glad you are here!!
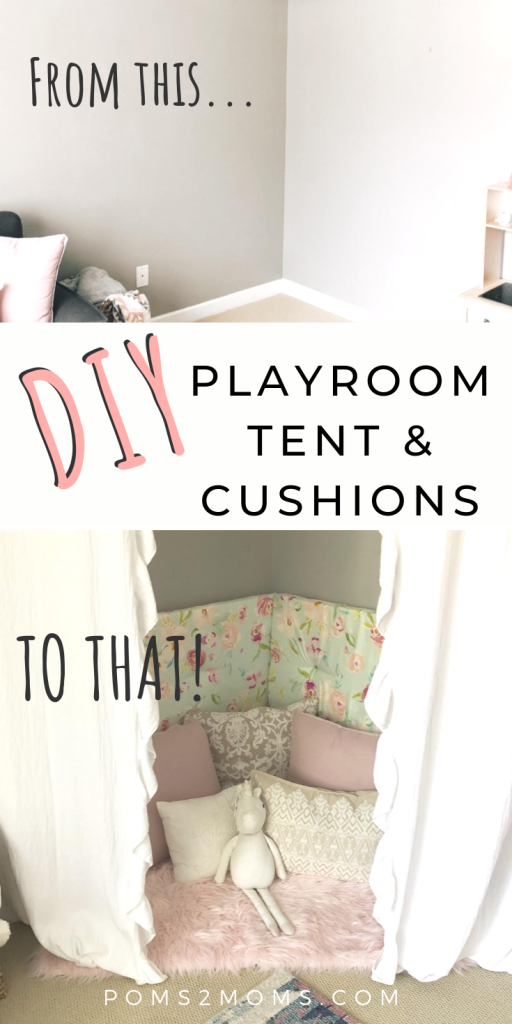
To get EVERYONE up to speed with the project I’ve been working on, a few months back I was in a major dilemma with our playroom set up. I really wanted a corner playroom tent that allowed the girls to have a place to read books, play house, dress up, and do other kid tent things… BUT I also wanted 1.) to maximize space and 2.) to of course, be cute!
So before going any further, if you have not read about my adorable and simple DIY playroom tent, please do… then come back and check out this new addition!
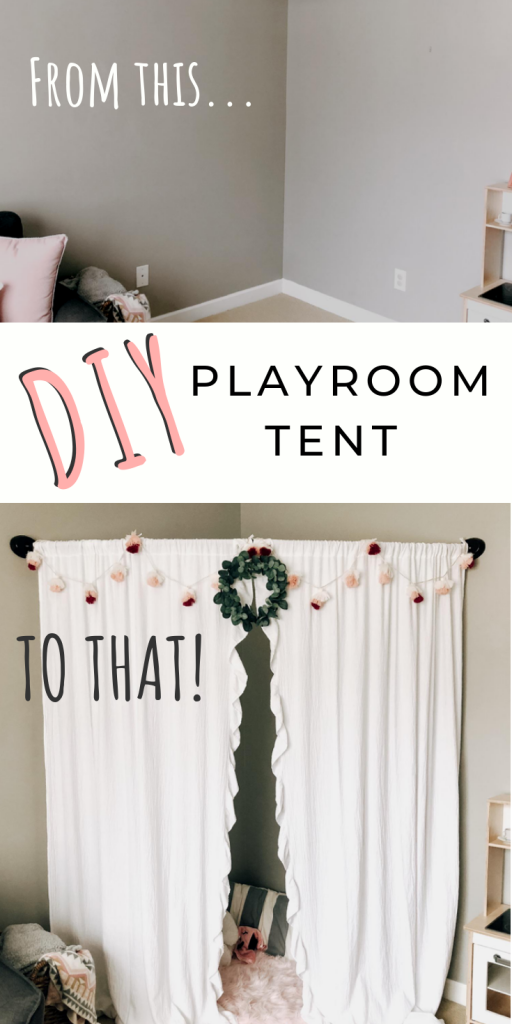
With the tent residing in the corner of our playroom, the girls would run and jump into it knowing they could not fall out the back-side… and someone would always end up hitting their head. Or, less dangerously, they would move all the pillows and stuffed animals around and it would look like a bare wall surrounded by a teddy bear explosion. As a result, I knew that I wanted to create some type of soft surface to put on the wall that would stay in place, provide a soft landing pad, and of course, be super cute!
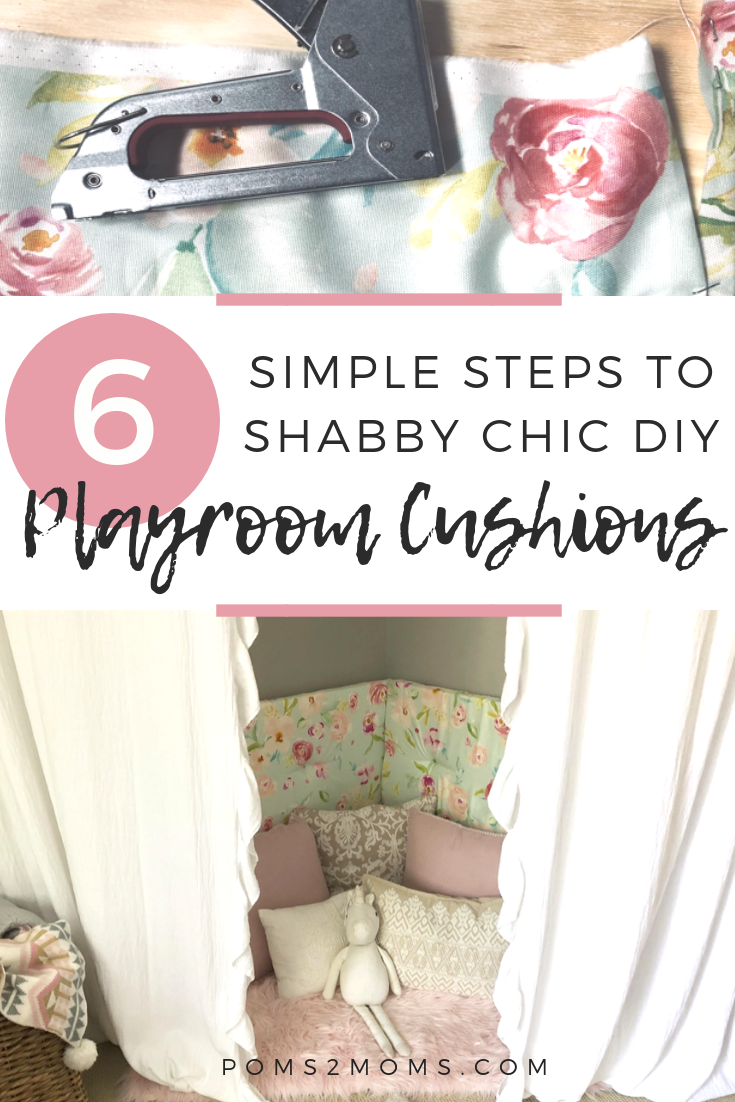
Hello! Nothing a simple DIY cushion couldn’t fix… and there was created, my new ultimate playroom tent hack!
Below is a list of what you need and I will walk you through the easy steps!
Supplies:
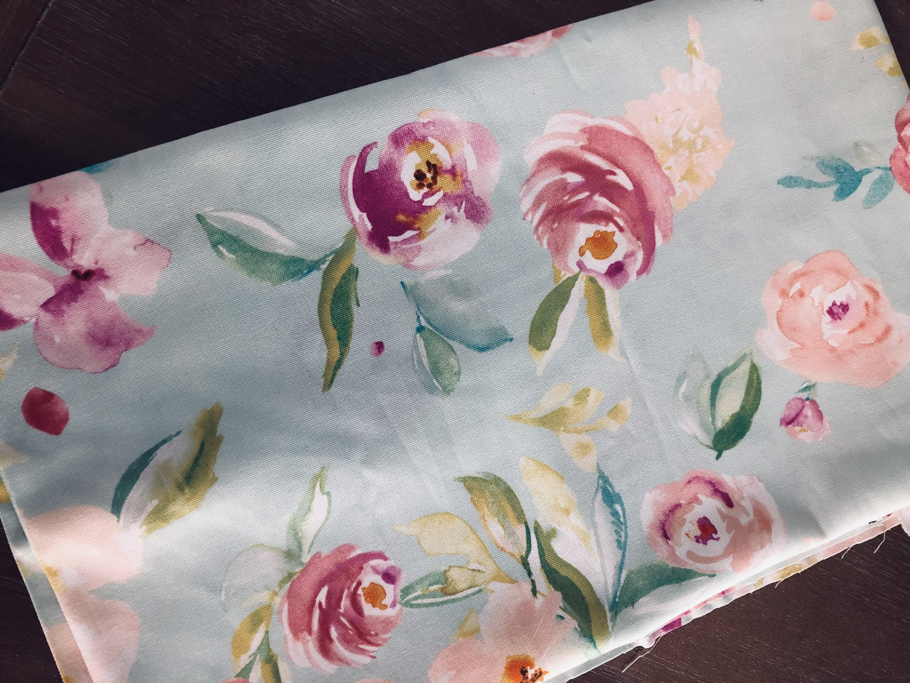
- Cute Fabric – I found mine at Hobby Lobby!
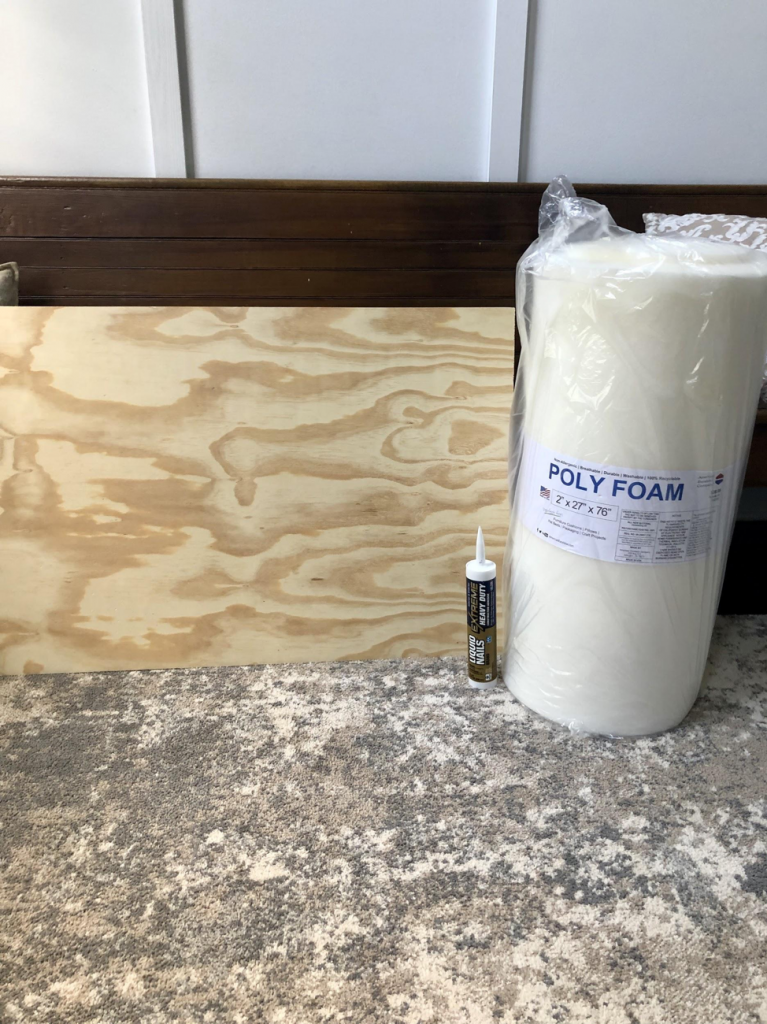
- Foam
- Liquid nails
- Thin plywood
- Upholstery stapler
- Measuring tape
- Nails/Screws
Step 1: Measure your space!
In this corner of the playroom, we have a telephone outlet and a regular plug in outlet. Neither can be covered, so I wanted my cushions to go from the corner to the edge of each outlet cover. (Reminder here that with your second measurement, subtract the width of the foam plus board because they will overlap in the corner!)
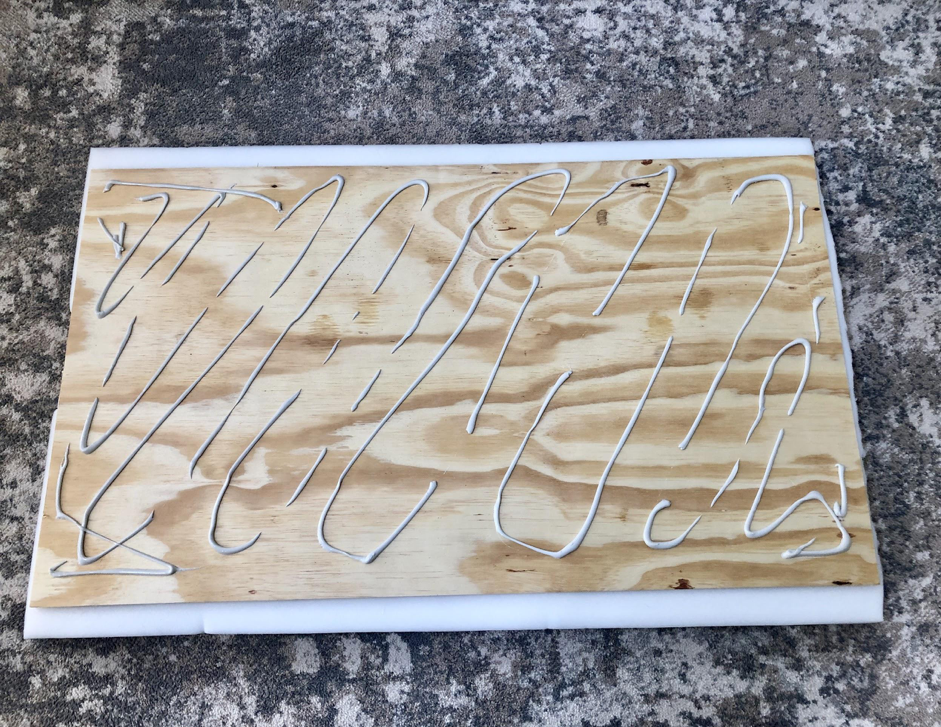
Step 2: Cut your board and attach the foam.
If you measure beforehand you can always have Lowes or Home Depot cut your wood for you! A saw is not required to do this project… use your FREE resources! Once I had my measurements I subtracted 1 inch. I wanted to have at least a half of an inch around the ends so that there wasn’t a chance of the board piercing through the fabric or creating a hard edge. I used regular scissors to cut my foam down to size. Using your liquid nails, squeeze it all over the back of your board and then press the foam down on top. Let it sit for 10 minutes.
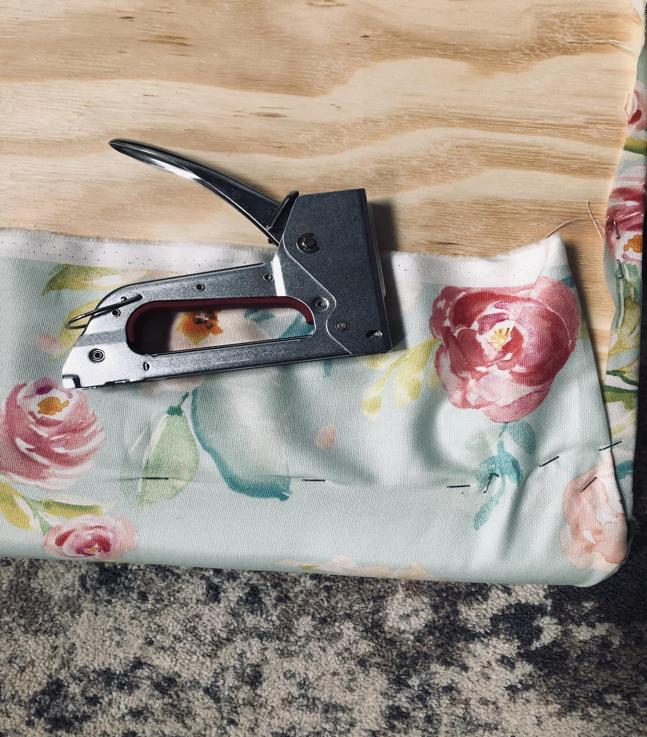
Step 3: Cut your fabric to cover fully around your cushion.
Pull your fabric around the cushion and staple into the wood. I put a staple in every 4 inches.
Be careful not to pull your fabric too tight or you will get a bubbly edge. I did this the first time, so I learned for the second.
Step 4: Hang your cushion.
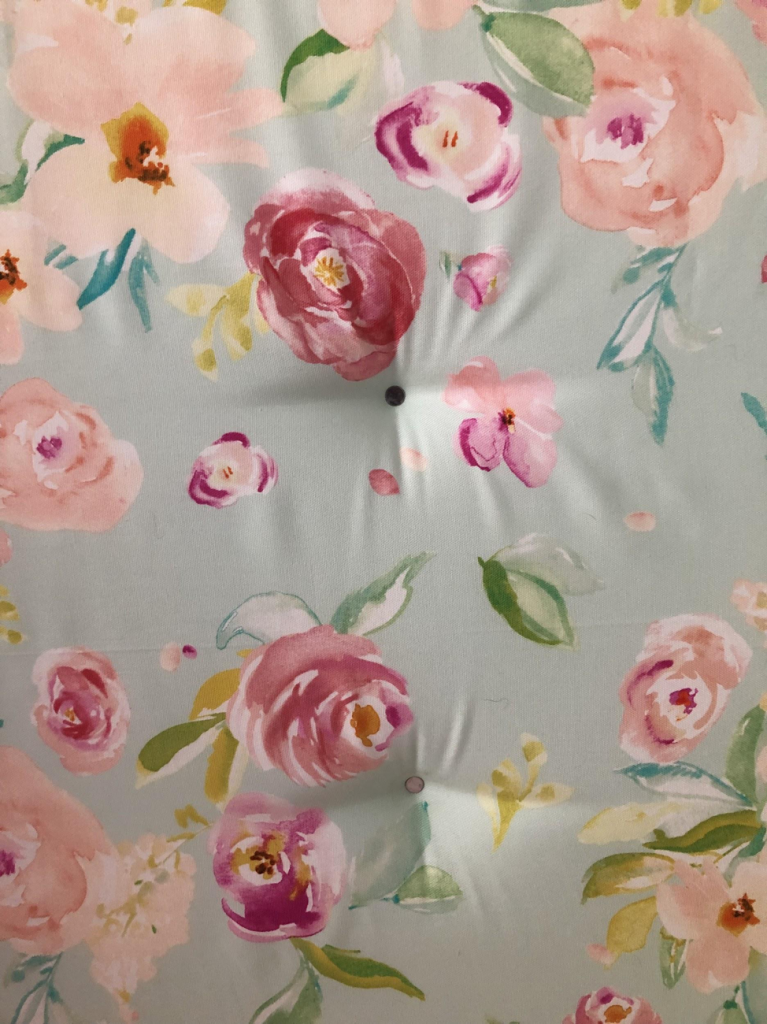
This is still puzzling to me, but I came up with the best solution I had. I needed a way to mount this cushion to the wall without a.) glueing it and b.) screwing anything into the back of it that would have a sharp edge that the girls could possibly feel through the foam.
So… my husband, Drew, and I found the studs along the wall and and decided we would use a large nail that had a solid flat surface and hammer through the foam into the studs. Conveniently, studs are evenly spaced so it did not create a weird, asymmetrical pattern of nails and as another added bonus… added a nice tufted detail.
If you have any other tips on how to hang this, please let me know so we can share! I am by no means an expert, just a mom trying to do things quickly, easily, and with a super cute and functional outcome 🙂
Step 5: Add the final touches to your playroom tent hack.
To cover up the nail holes, I ordered fabric covered buttons off Amazon and just glued them over the top of the nails. It turned out great because it looks like a custom tufted cushion!
To finish it off, I added a few other pillows to soften it up and now… I think it looks amazing! Our initial DIY tent project was such a fun and creative idea, but this playroom tent HACK was exactly what we needed to keep it safe and beautiful.
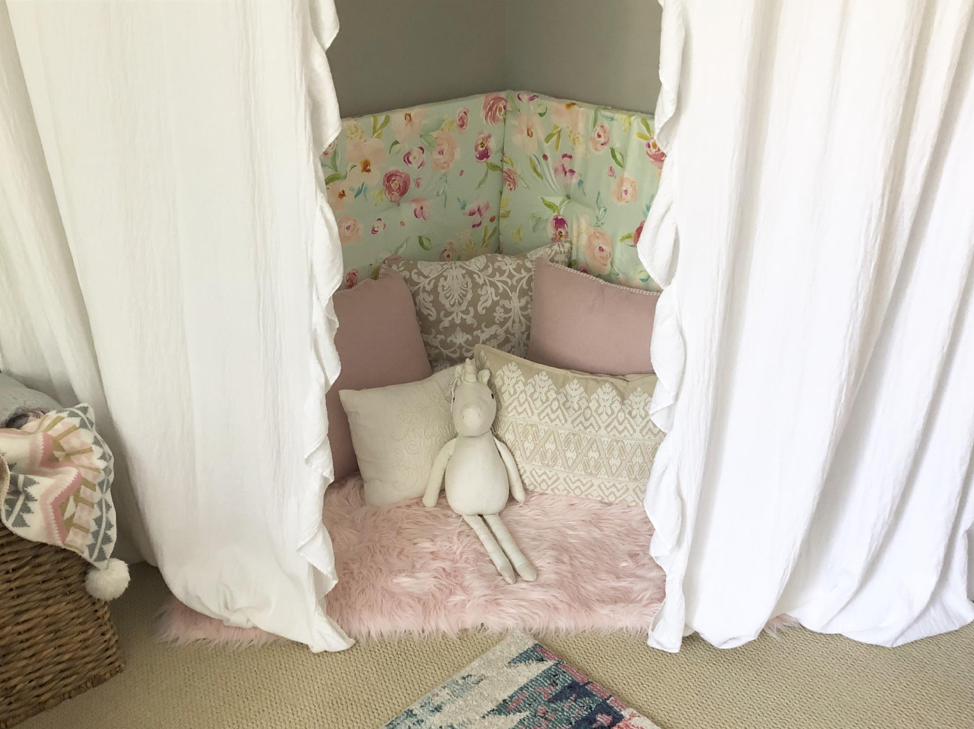
With so many views on this particular post, I hope that I can also (fashionably) save a few head bonks! If you’ve created this DIY corner playroom tent, yourself, what ideas have you come up with to enhance it even more?

About The Author
Jenny
Founder & author of the parenting & lifestyle blog, Poms2Moms, but my full-time job is wine. Find me writing about my two precious girls, aspirations to become friends with Joanna Gaines, and balancing home-life with my career. Cheers! – Jenny
Gina Abernathy/ homeatcedarspringsfarm.com | 20th Aug 19
How cute and cozy for little ones! Love!
Deborah Hunter Kells | 20th Aug 19
Well done! I know with my children – the most favoured thing was having a “mock up” tent. This is a keeper!
Heather Gonzales | 20th Aug 19
That looks super fun! My kids are always wanting a tent of some sort. Once we can switch our boys to bunk beds (don’t quite trust them yet), we should totally do this in their room!
Katy LV | 20th Aug 19
This is the sweetest! My 4 yr old will love it.
Jordan | 20th Aug 19
LOVE this!! How cute! Definitely going to try my hand at this in my daughter’s room 🙂
Disha Smith | 21st Aug 19
This is so adorable!! I don’t have kids yet, but I’m going to share this with my friend who has a daughter. She will love this!
Falak | 21st Aug 19
Love this! It looks beautiful. My girls are going to go crazy if I make something like this! Thank you for sharing the process.
Ashley | 21st Aug 19
This is darling. You have inspired me to decorate my kids playroom!
admin | 3rd Sep 19
Thank you! Have fun! It is such a fun place to be creative in!