The Only Breastmilk Storage Hack You’ll Ever Need
As I write this, Maddie is officially 38 weeks old—exactly how long she was in utero. “38 weeks in, 38 weeks out.” I’ve been fortunate enough to have an amazing breastfeeding journey with her these past 8.5 months, and while I never envisioned going beyond a year, this weird part of me isn’t ready for it to end in a couple of months.
Is it because she’s my last baby? Is it because it’s actually kind of easy this go-round? Is it because breastfeeding is literally the only thing allowing me to skip the gym AND burn calories? I guess it will remain a mystery… 😉
[ReviewDisclaimer]
Anyway, I’ve also been fortunate to produce enough for MJ plus one. Literally. I have donated over 750 oz to a fellow mom with an adopted baby boy. It was one of my highlights of 2017 and I feel so incredibly thankful I was able to give such a gift to a wonderful family.
All that being said, I also quickly stockpiled an additional 750 oz to have on reserve for MJ. Storing all of that milk required some very creative organizational skills. While I thought I was behind in the milk storage game, I couldn’t believe how many people commended my “genius idea” after seeing it for themselves.
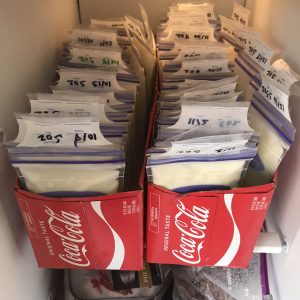
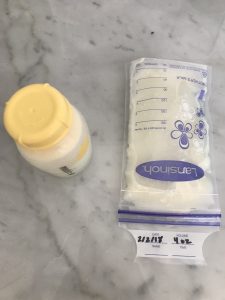
It ain’t pretty, but look at me in the virtual eye and tell me it’s not practical. #whateverworksmom
And while I’d love to be able to take credit for this, I have to give a shout-out to Pinterest and Diary of a Fit Mommy for the original inspiration.
What you need:
- Milk – a lot of it, a little of it – doesn’t matter.
- Milk storage bags – my favorites are Lansinoh because they lay flat!
- A sharpie
- Scissors
- An empty soda box (Coke > Pepsi. This is not open for dispute.)
- Two hands, because you’re going to want to give yourself a high five when you’re done with this.

1. With the sharpie, label the bag with the date and number of ounces you added.
(*Note – Lansinoh bags only hold up to 6 oz, so don’t go too wild, milk mama.)
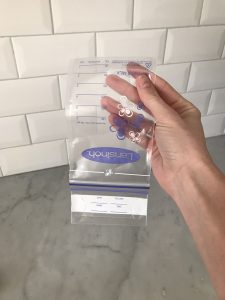
2. Carefully pour whatever milk you just pumped into the Lanisoh bag.
3. Lay the bag flat in your freezer until it is rock solid.
4. Cut off the top of the soda box.

5. Once your bag is totally frozen, stack that bag in the front.
For all bags pumped thereafter, continue to line them by date behind each previously pumped bag.
6. Conduct aforementioned high five.
You’re done!
Now pour yourself a glass of wine, momma, hire a babysitter and take your partner out on a date. Because girlfriend, you just started building yourself a supply to take care of that little nugget of yours and you deserve a break!
Need help with milk storage guidelines or building your supply? I’d love to help! Email poms2moms@gmail.com or leave a comment below!

About The Author
Kaitlin
Founder & author of the parenting & lifestyle blog, Poms2Moms. Wife, girl mom, and lover of all things outdoors, food, and wine. Travel is my love language, Netflix binges… my guilty pleasure. Find me writing about toddler drama, baby’s first year, progressive parenting, and more. Cheers! – Kaitlin
Katie | 2nd Mar 18
Hey girl! I love how you’ve been able to help someone else with your milk!! Def saving boxes at work. Did you have to get an extra freezer? How were you able to make more room in your freezer? (Mine always seems full) Did you start freezing immediately? I’m hoping to stock pile more this go round given things go as well as they did with Harper. Thank you!!
Kaitlin Konetchy | 9th Mar 18
Sorry just getting back to you, Katie! Still figuring this whole thing out. We have an extra fridge in our garage so that has been a lifesaver this go round. However, with Lilly in our old house, we had 1 fridge/freezer and no garage so I just had to get SUPER organized to make it work. And yes – I started freezing right away! I had a crazy oversupply with both girls at first (which has both its pros and cons) but I went ahead and built up a stash! So excited for your family and the new little. <3